Speech#
Speech# is a Unity Asset that allows you to create dialogue for games using nodes and scripting using native C#.
Speech# - Basics
Speech# - Quick Start Guide
Overview
This asset is for leveraging your experience with programming in Unity to create unique, dynamic experiences.
This system truly lets you tie dialogue events, logic, and branching directly into your existing gameplay systems simply by adding a reference to the scripts of those systems just like with traditional C# scripting in Unity.
General Structure
There are a few key elements to how this dialogue system works:
1. Dialogue Trees / Graph Editor
2. Progressing from one node to the next connected node
3. A “dialogue character” (the character that will be speaking with the player)
The core of this system is built around these key elements.
Dialogue Tree
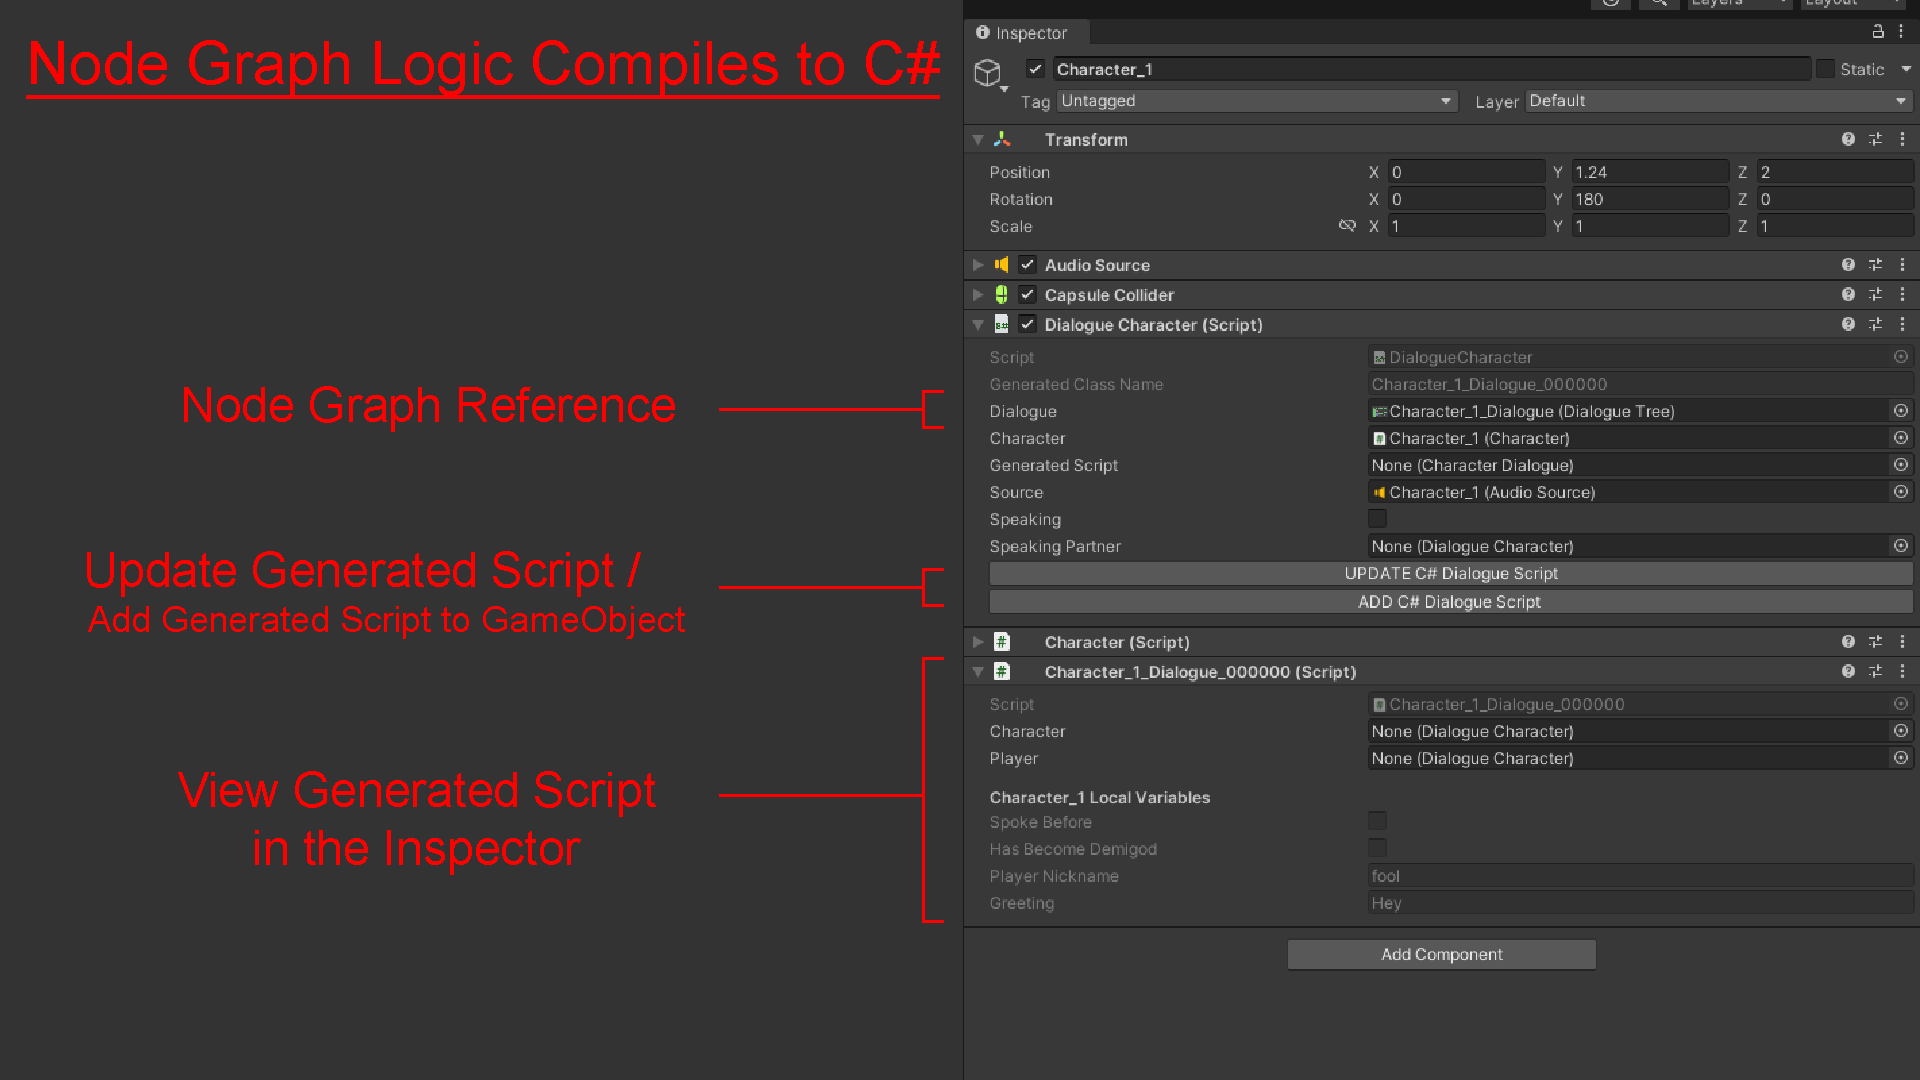
The dialogue tree is the asset that stores all the nodes you create for a dialogue. All your dialogue and branching logic is written in the node editor then the logic automatically compiled into a C# script. This allows you to take full advantage of the C# language when creating logic and see any errors in the same way you would for other scripts in your game.
Node to Node Progress
Triggering nodes is the basic method of traversing the graph at runtime and each time you want to move from one node to another there is a unified event to call for all nodes. This makes it simple to add new nodes to this system and create your own interface for using your graphs, or you can simply edit the example script provided.
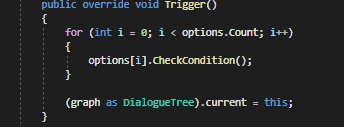
The general flow is to add DialogueCharacter.cs to a character object, write your dialogue in a dialogue tree, generate a script based on that dialogue tree, and then display the dialogue in game by triggering each node to progress.
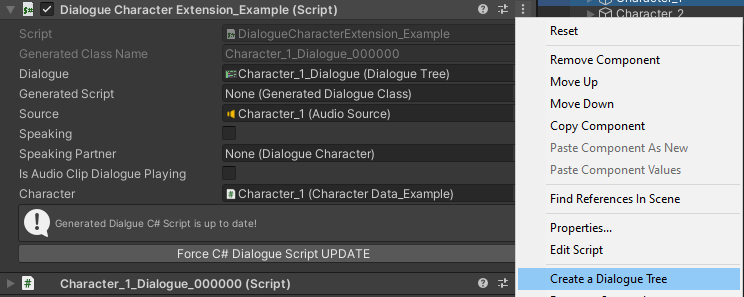
Dialogue Character
A dialogue character is a GameObject with a specific component/script that can talk in your game. This component, DialogueCharacter.cs, is meant to hold all references to other scripts needed for scripting logic in your dialogue trees.
For example, if you have stats for your character, you could reference that script in the DialogueCharacter.cs script to easily reference those variables when writing dialogue.
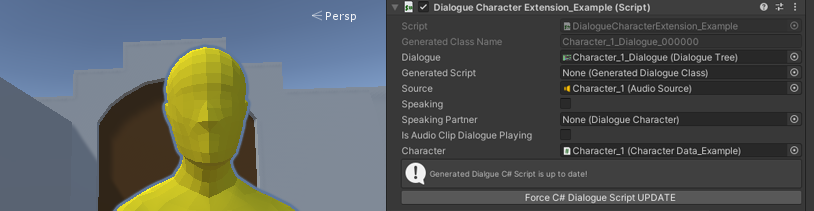
The first person example scene included with the asset includes a DialogueCharacterExtension_Example.cs class that inherits from the base DialogueCharacter.cs to collect functions and class references used just for the demo dialogues.
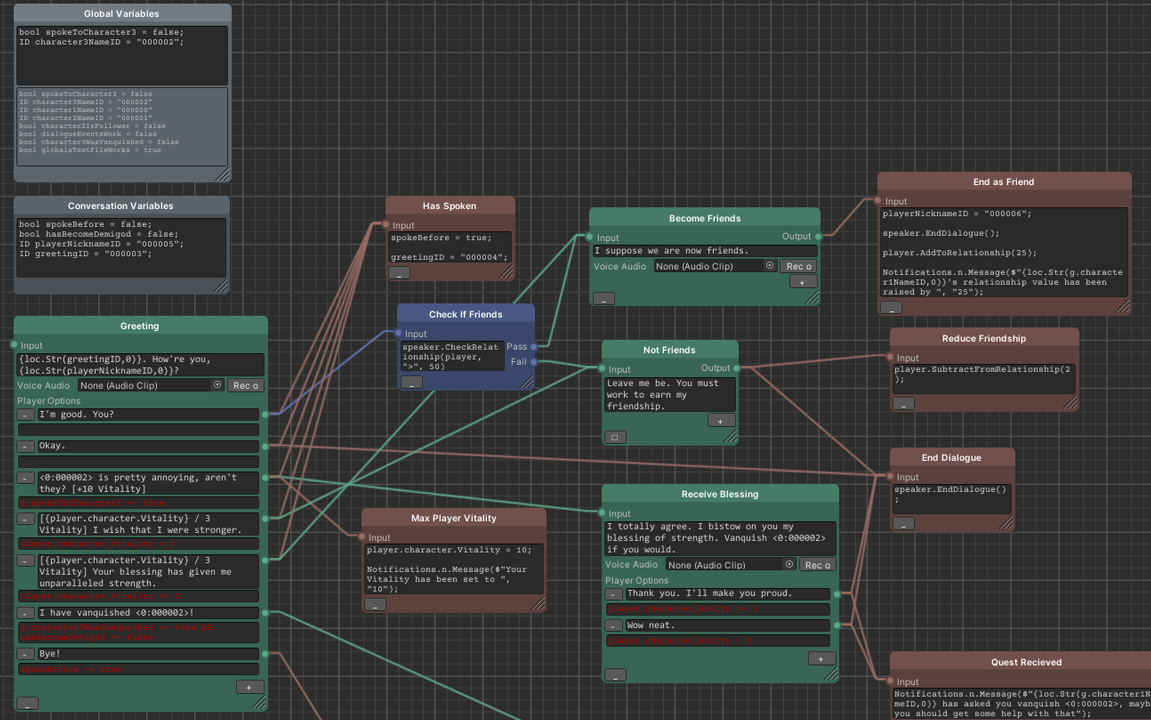
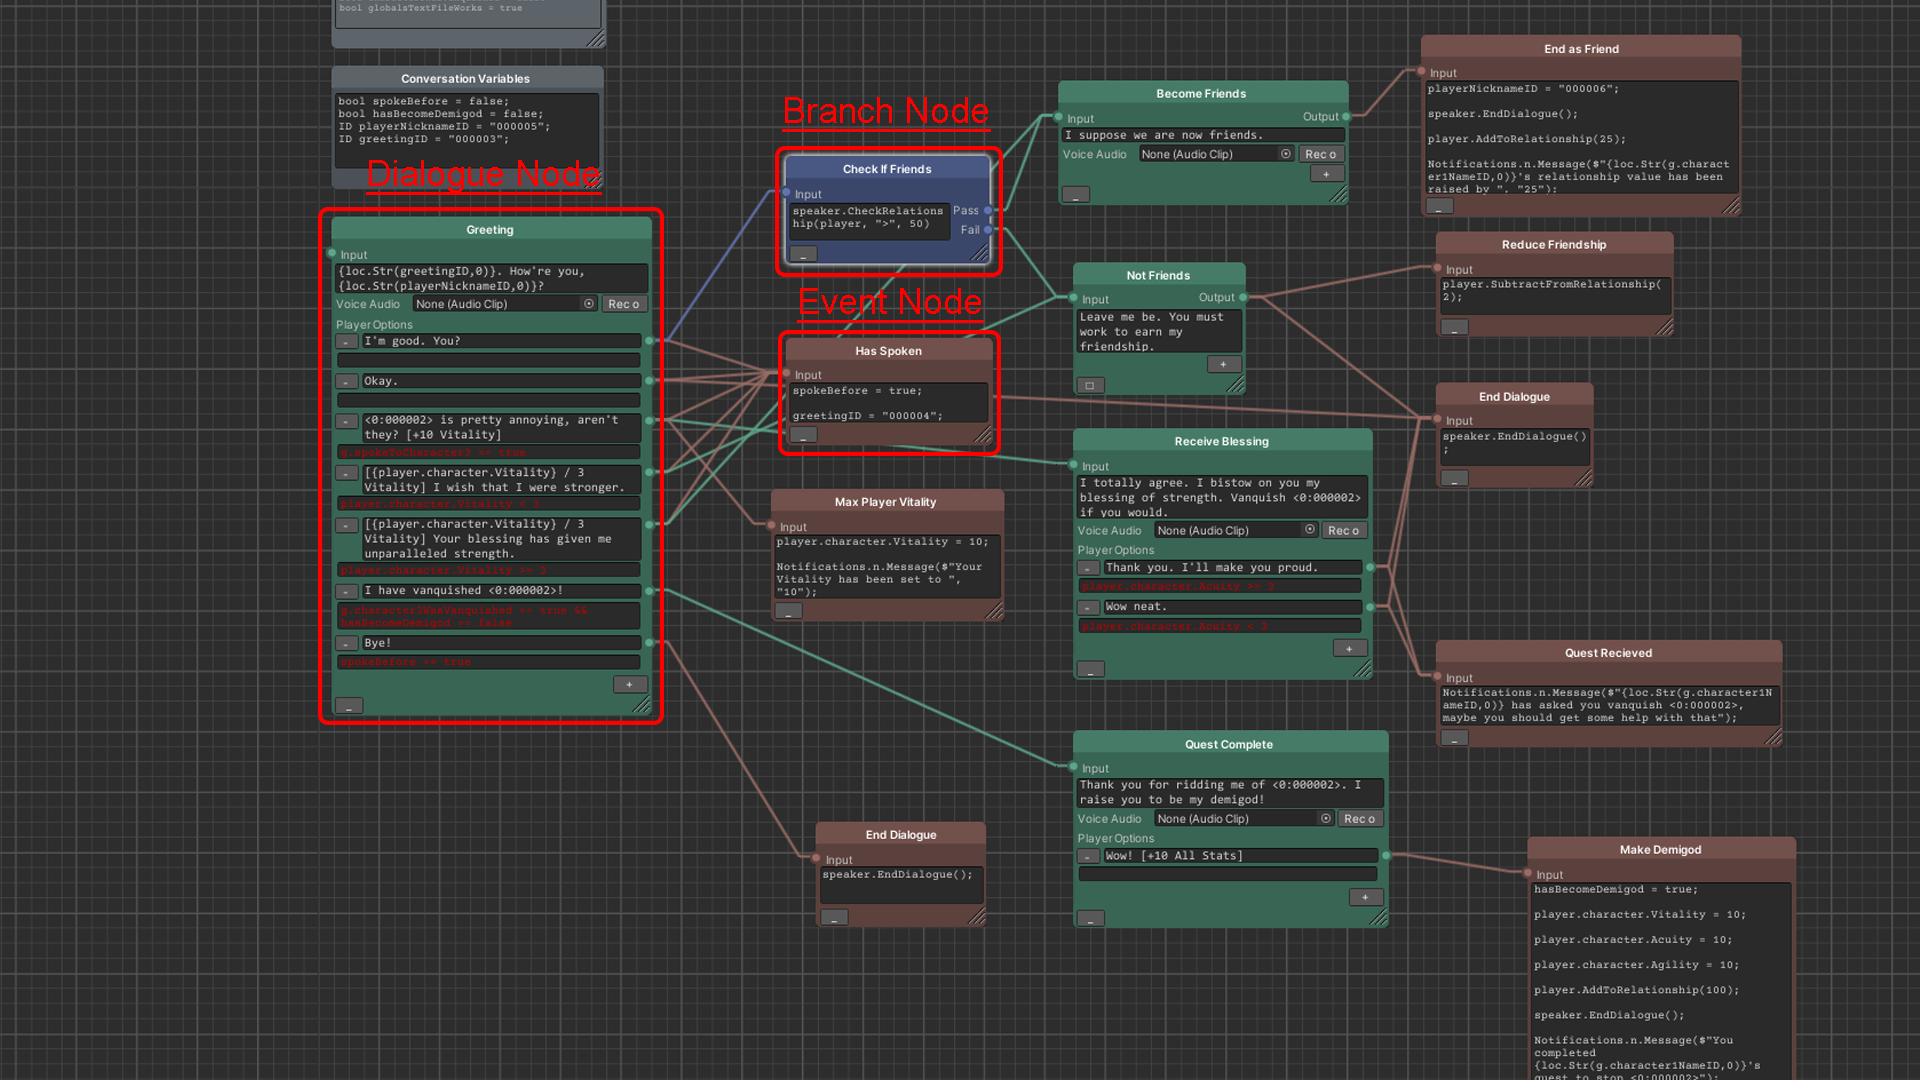
The Nodes
There are 3 main nodes that are used to creating dialogue. The dialogue node, branch node, and the event node that will contain all the data and logic needed to run a dynamic dialogue in game.
There are 2 additional nodes that allow you define local variables accessible in just this dialogue tree or global variables that can are accessible to all dialogue trees and other systems in your game.
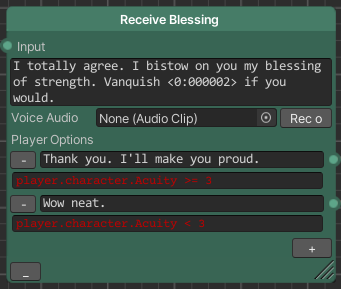
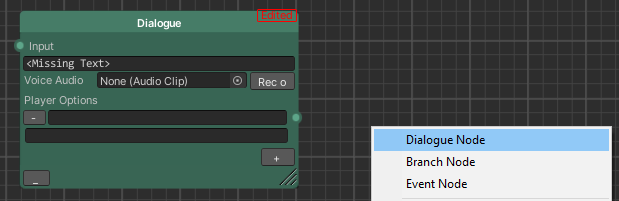
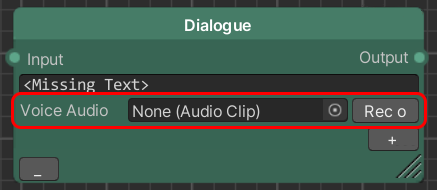
Dialogue Nodes
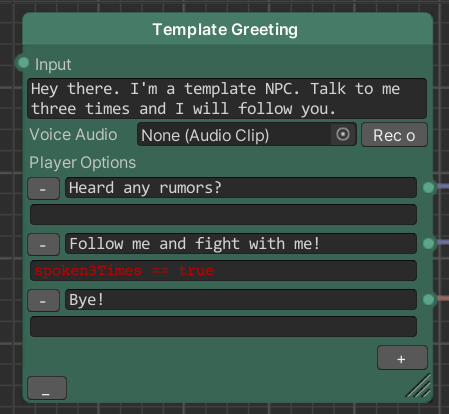
Dialogue nodes contain the speech that the character will say to the player and then any options the player has available to respond to the character.
Each option for the player also has a red text field under it that can contain logic required for the option to be seen by the player. These should be written as you would for the contents of an “if statement”.
Think of any logic placed in that field as being the contents of an if statement. The plus and minus buttons will add or remove dialogue options to the node, always adding and removing from the bottom.
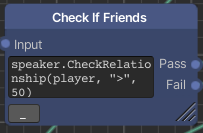
Branch Nodes
Branch nodes are how you check a simple condition to go to one of two different directions in a conversation.
This could something simple like checking if the player has spoken to the character already to have a different response or chaining multiple branches together to create a precise response to the current player’s world state.
The text you write in this field is much the same as the conditions for a dialogue option and should be written as you would for an “if statement”.
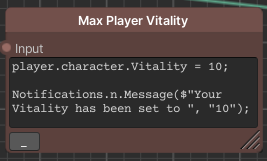
Event Nodes
Event nodes are a block of code that will run just like any normal C# function.
Anything that you can write in C# can be added to an Event node whether that be sending a notification of to the player, changing how a character thinks about the player, or activating an entire system unique to your game.
The one thing to keep in mind is that anything you want access to when scripting in the dialogue tree should be added to the DialogueCharacter.cs script (or an inheriting script) for ease of use.
Conversation and Global Variables Nodes
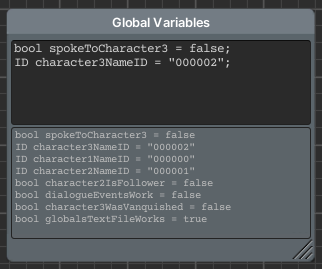
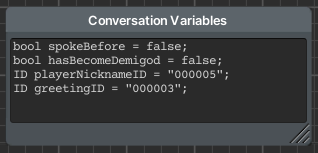
The final two nodes are the Global Variables and the Conversation Variables nodes.
The Global Variables nodes from all dialogue trees will be added to one script called Globals.cs and any variables you define in this node will be easily accessible from all dialogue trees.
The Conversation Variables node is where you define any variables you only need to be accessible within the current dialogue tree you are working on.
Creating a Dialogue Tree
As mentioned, the dialogue tree is just an asset that you can create like any other asset, but there is also an easy way to add a new tree from the DialogueCharacter.cs script on a GameObject.

This asset will have a default location to be created that can be changed in Speech#’s Preferences menu.
There are several other generated assets that also have default locations you can change to help streamline the workflow of writing dialogue for multiple characters, but there is also an option to choose where you want to place an asset each time you create one.

Using the Dialogue Tree
Whenever you make a new dialogue tree there will be a starting Dialogue, Global Variables, and Conversation Variables node already created.
The starting node for any graph is the node that does not have any inputs to it and so it is likely best to build out from the default dialogue node.
Adding Nodes
To add more nodes simply right click in the graph view and select the node type you want to add.
Right clicking on the graph and moving your mouse will allow you to move your view of you dialogue and the mouse wheel will let you zoom in and out.
There are also several settings in the Preferences menu to adjust how the graph works and appears.
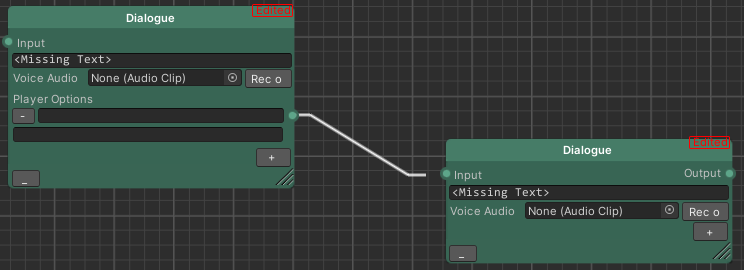
Connecting Nodes
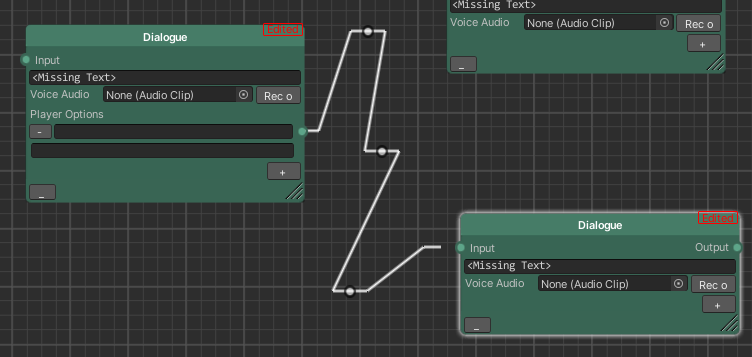
Once you have multiple nodes you can connect them by simply left clicking on an output and dragging to the input of another node.
If you need to create a specific path for a node tether, press right mouse button while dragging the tether to pin the that part of the tether to the graph view.
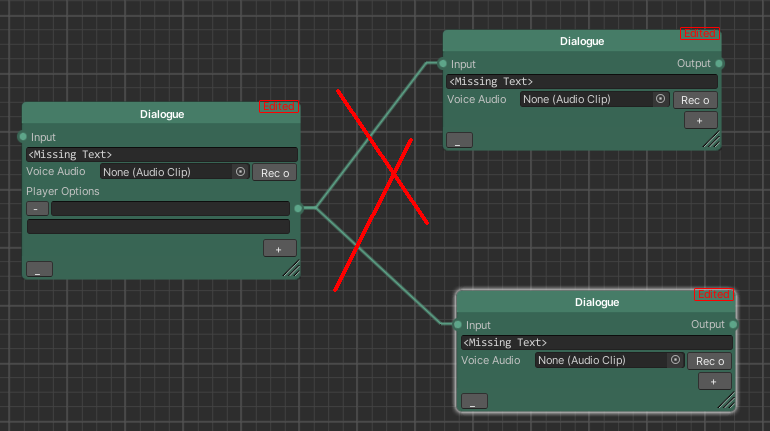
Common Mistakes
When creating a dialogue tree make sure that there is not an output leading to two branch or dialogue nodes directly. Make sure that it is always clear what node should be next or create a branch node to have logic for choosing between two progression paths.
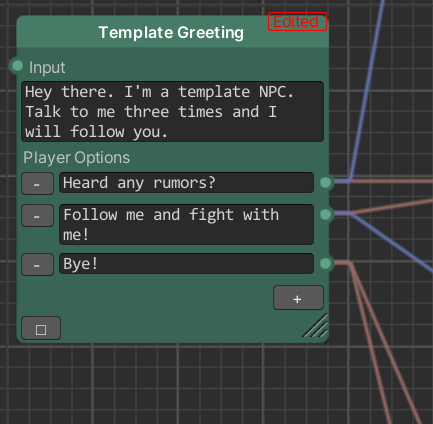
Minimizing/Maximizing Nodes
To help keep things clean to look at or reach through there is a minimize and maximize button in the bottom left of each node. This will only show the necessary information for reading the dialogue and options while hiding the logic used to traverse the tree.
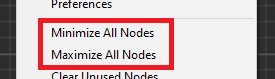
To maximize or minimize all nodes there is a helper function that can be seen when right clicking on a blank part of the graph. There are a few other helper functions available in this menu that may help when creating trees.
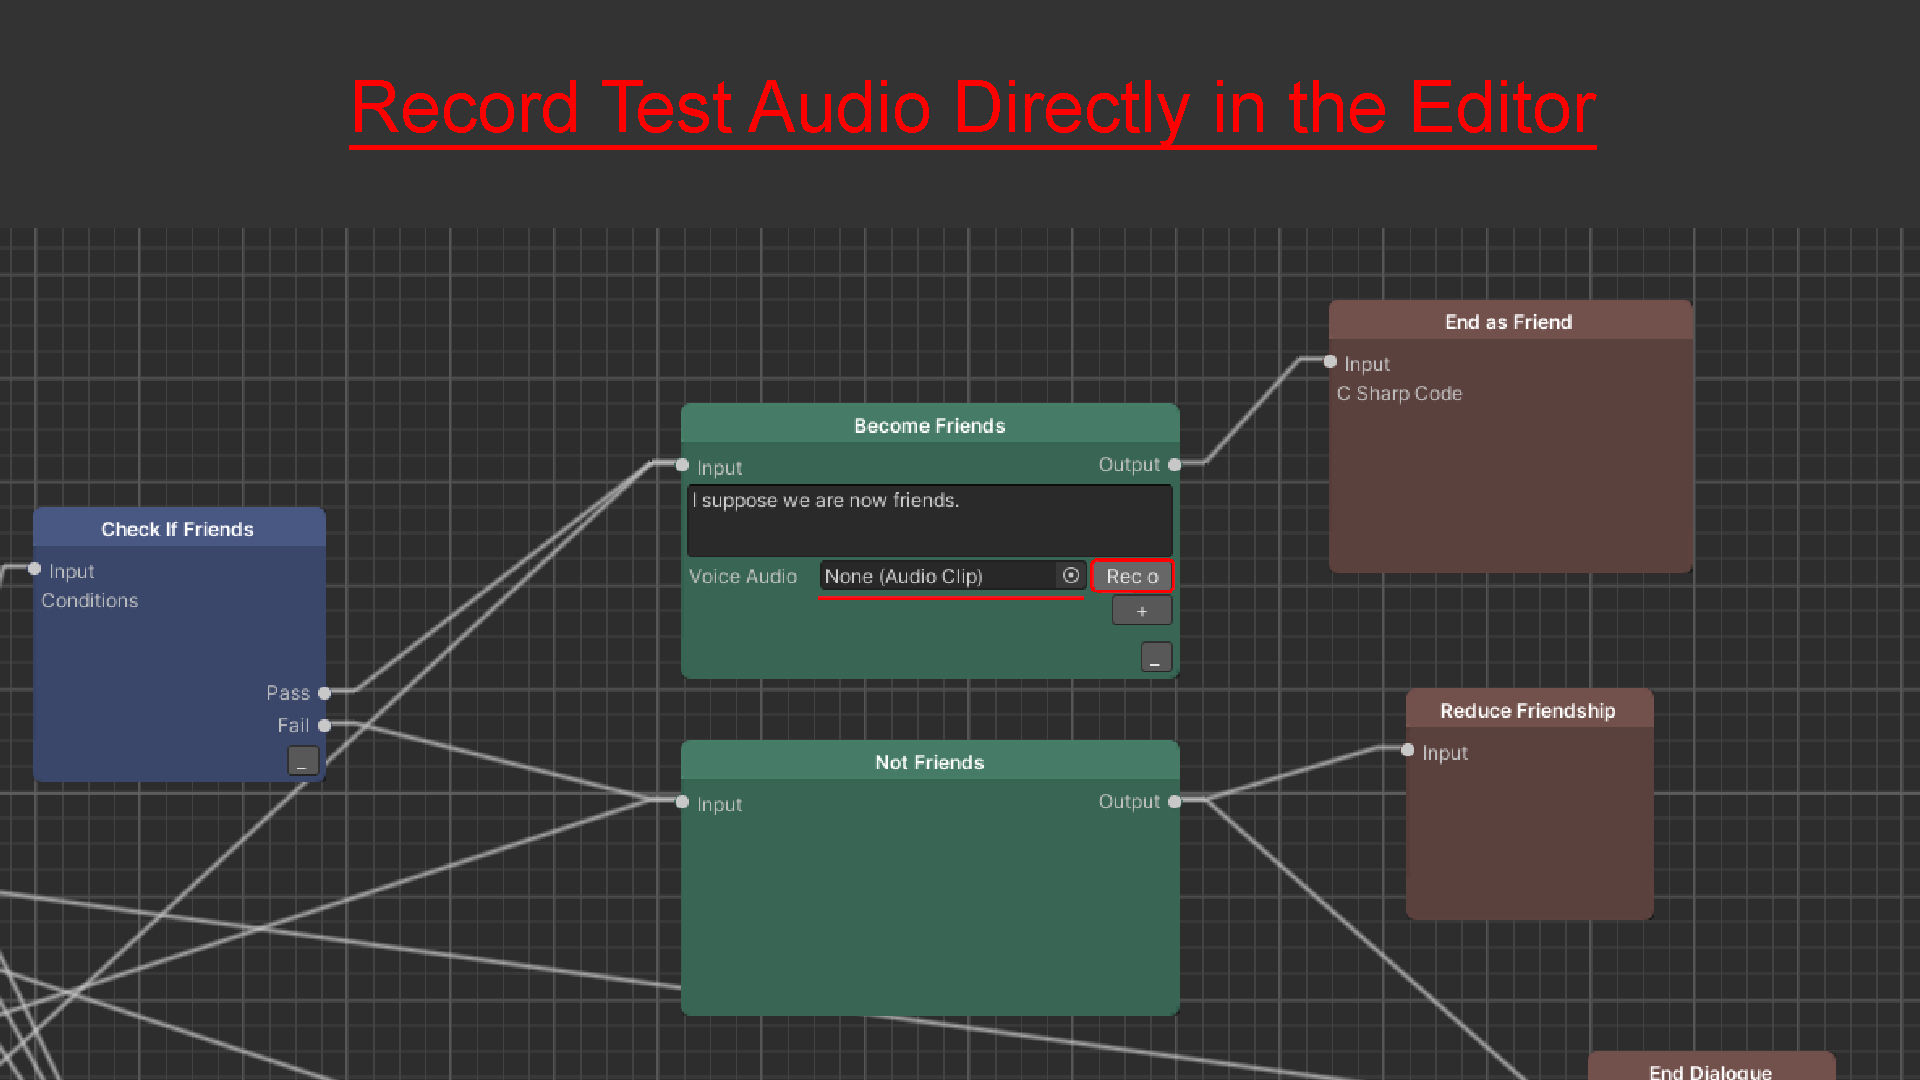
Recording Dialogue Audio Clips
There is a field to record dialogue for the character speaking or you can drag an existing file into the node once you have a completed recording.
If you plan to have voiced dialogue, I suggest recording yourself saying each line in the dialogue graph to help with testing, editing dialogue, and to help predict the time needed for recording with an actor.
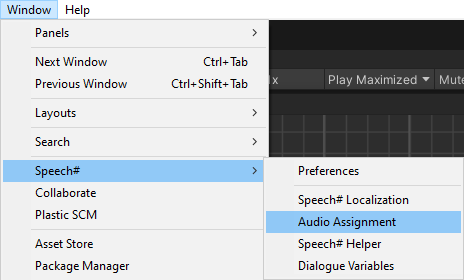
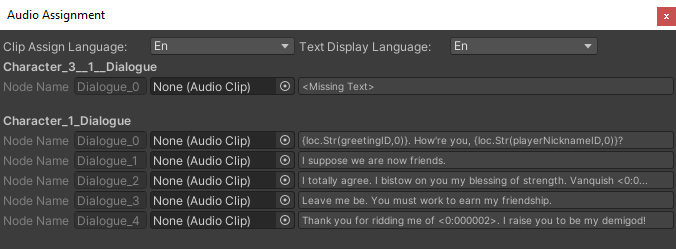
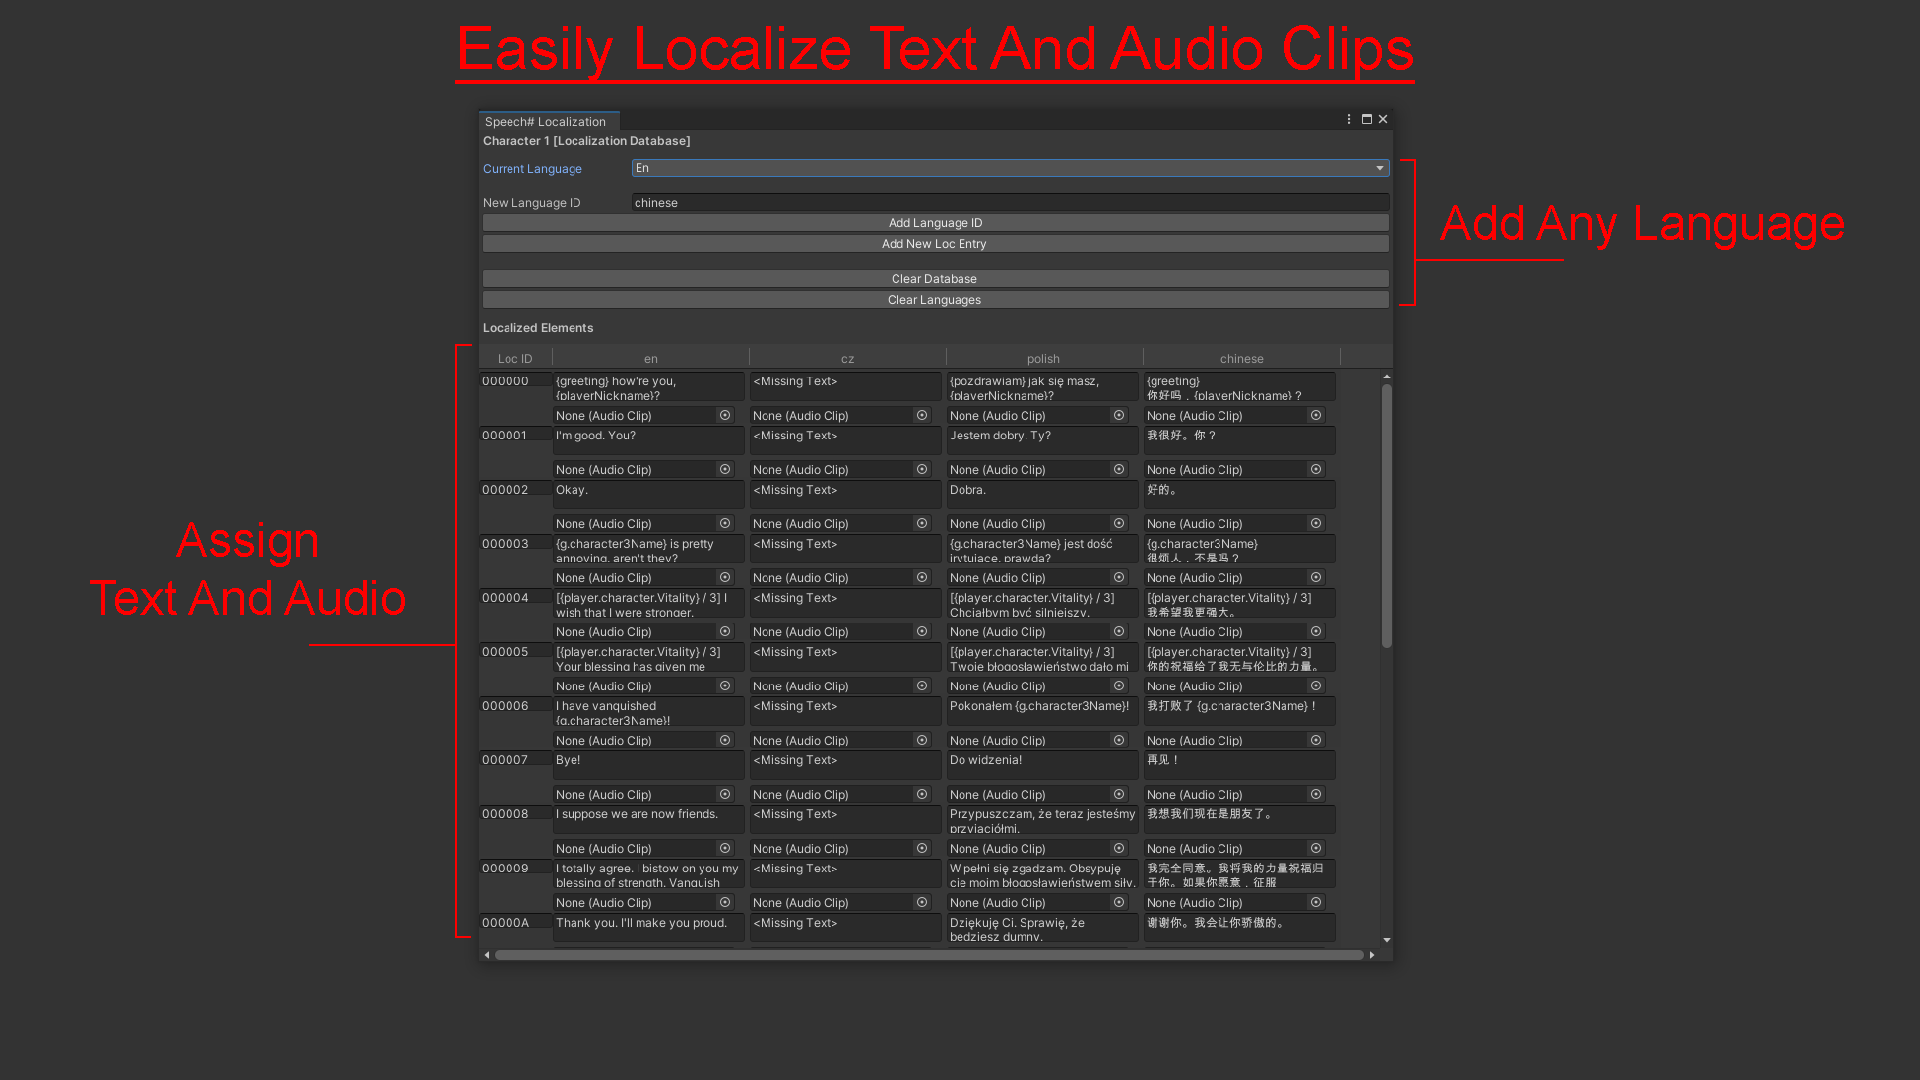
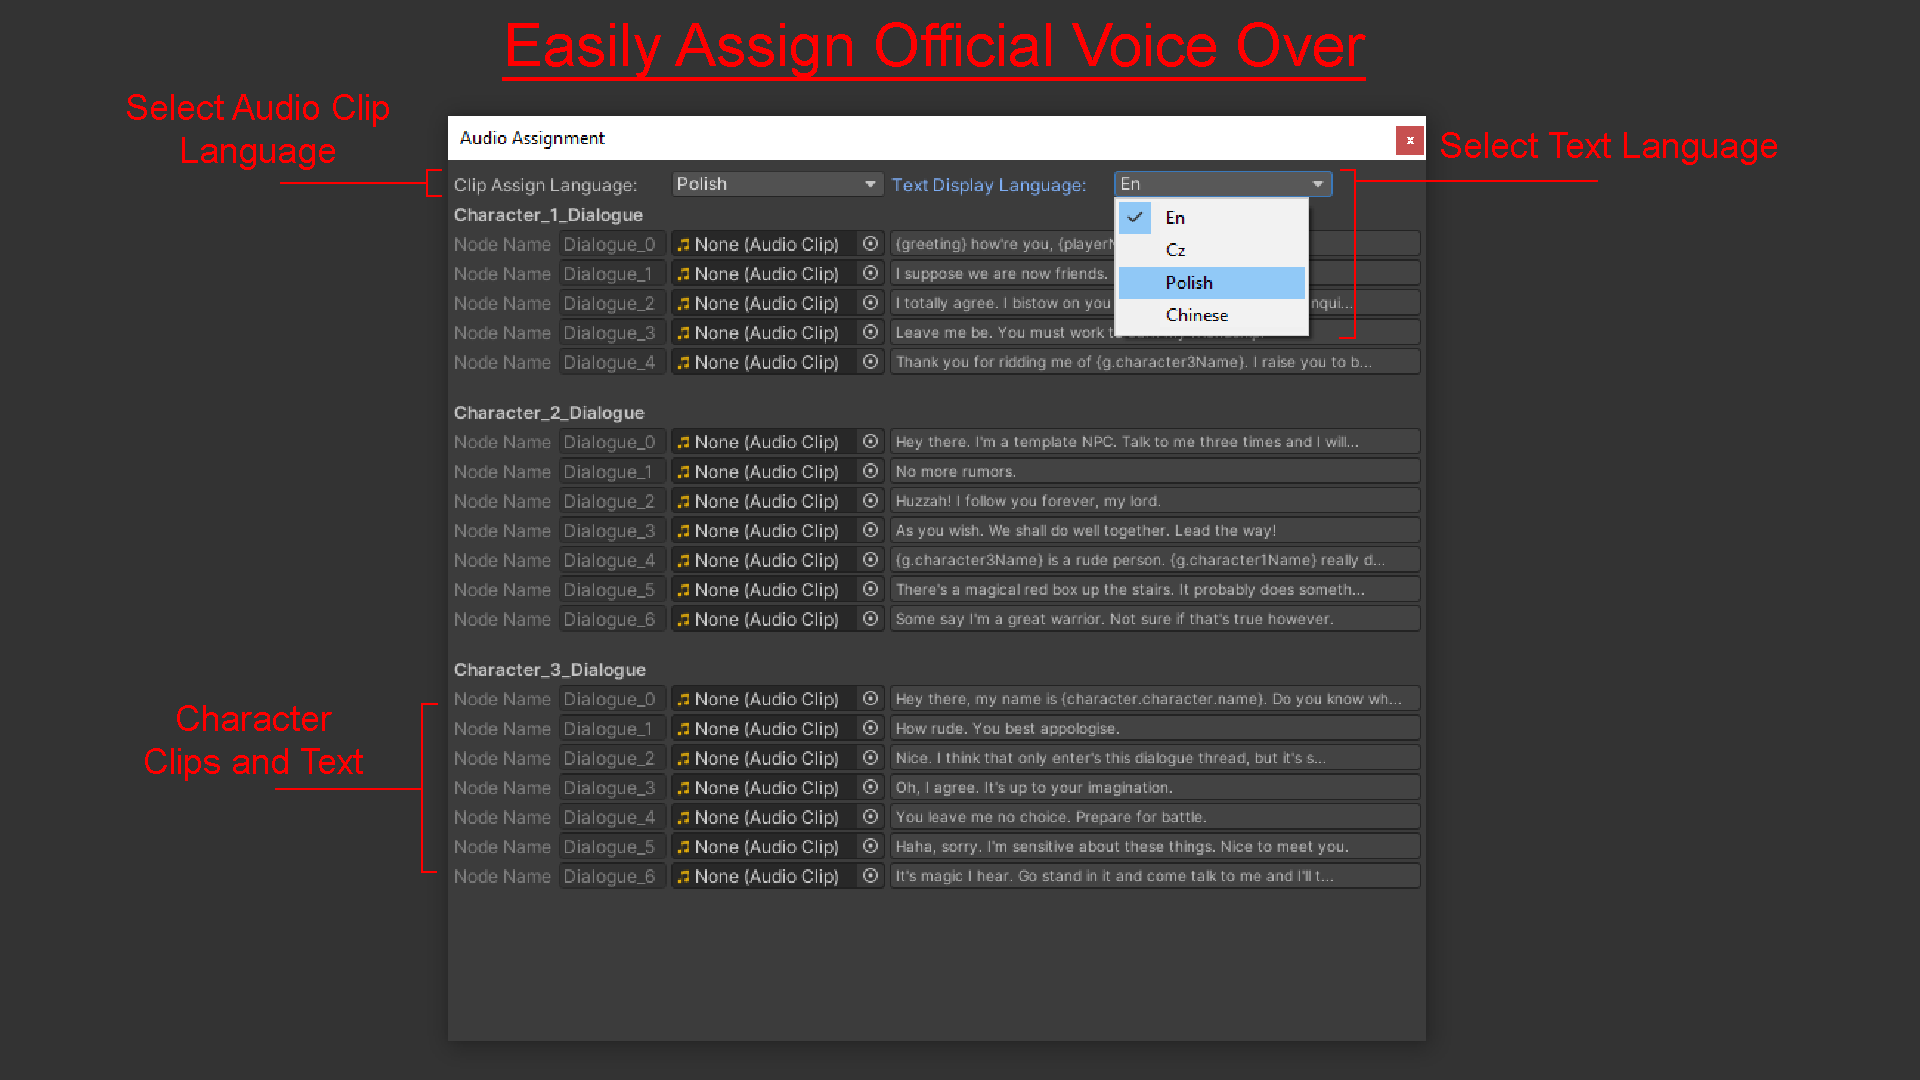
Assigning Final Dialogue Audio Clips
For assigning final audio clips more easily there is a “Audio Assignment Window” that can make it much easier to assign to the intended dialogue tree.
Ending Dialogue Tree Conversations
Whenever a dialogue is complete, I suggest having an event node that calls whatever logic you want to use to end the dialogue.
There is a default function that can be referenced from any dialogue character simply called “EndDialogue()”, which is set up to work with the example conversation UI.
I think it is best to do that is an event node each time because it allows you to have an easy place to add any other logic you want when ending the conversation.
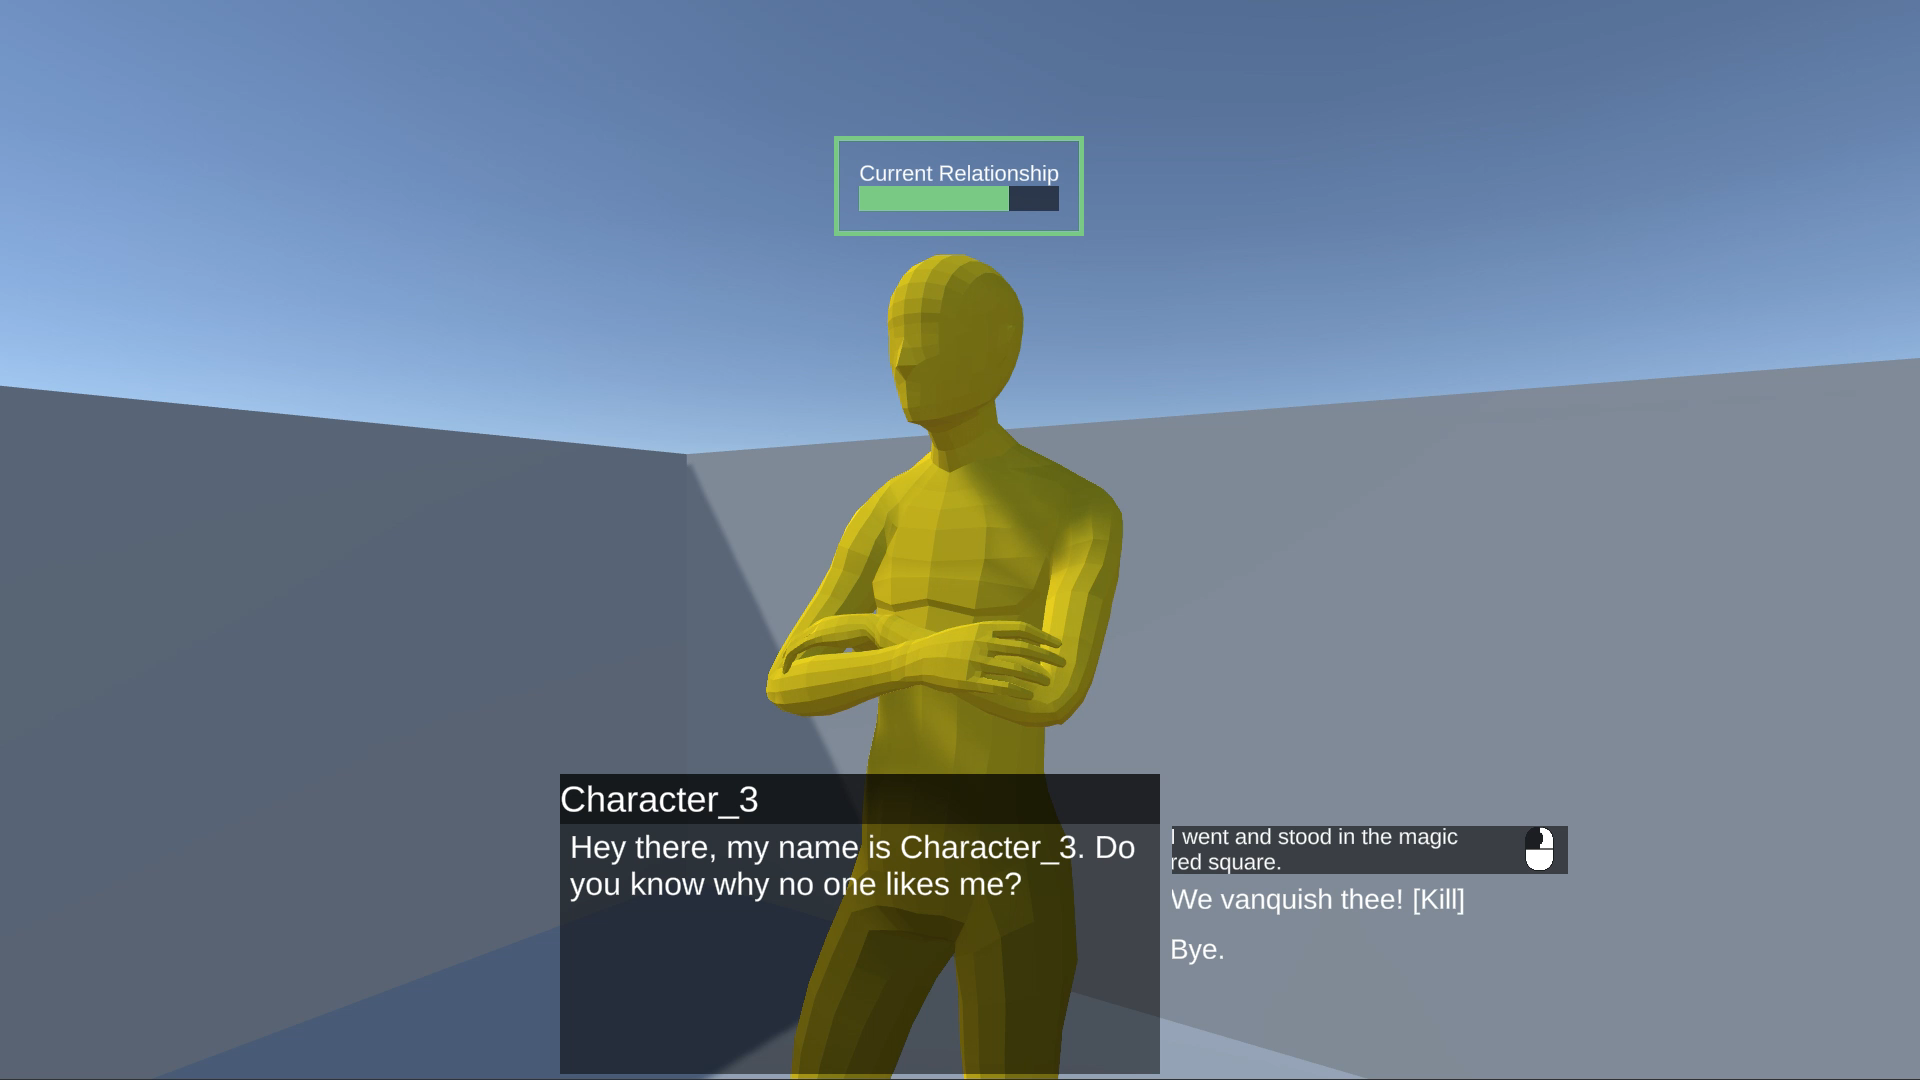
Dynamic Text
To compliment the dynamic nature of your dialogue you may need to display variables in your text. This is achieved by creating each line of dialogue as an interpolated string.
Basically, what this means is that if you type a variable name between a “{” and a “}” then the value of the variable will display in the dialogue.
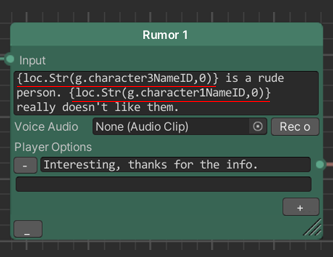
For example, if you have a string variable “playerName” with the value “Joe” then the dialogue “Hello, {playerName}, how are you?” would display as “Hello, Joe, how are you?” You can also use expressions and any other features of interpolated strings in C# to make your dialogue more dynamic.
Creating and Using Variables
As mentioned, there are two different nodes that allow you to make new variables.
These can be useful for tracking information about the player’s choices or when you need a state that multiple dialogue trees need to reference. Any time you are working with data or variable names in a dialogue tree, I would suggest defining it as a variable.
This can make the logic read more clearly, but also allows you to easily test multiple dialogue states by simply changing these variables in the editor. To references a global variable when writing in the dialogue graph you must write “g.” followed by the variable name you want to reference.


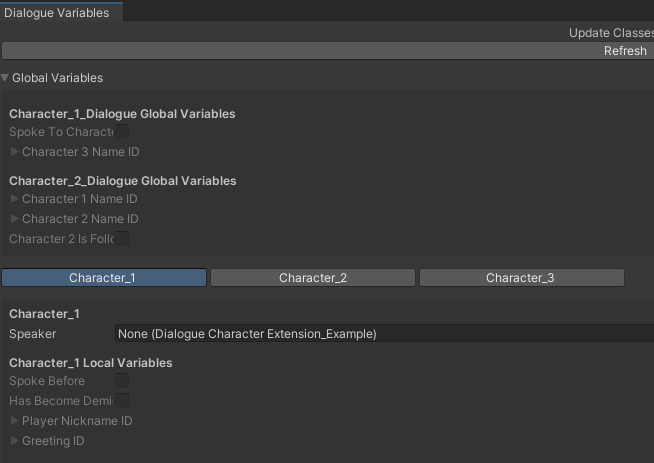
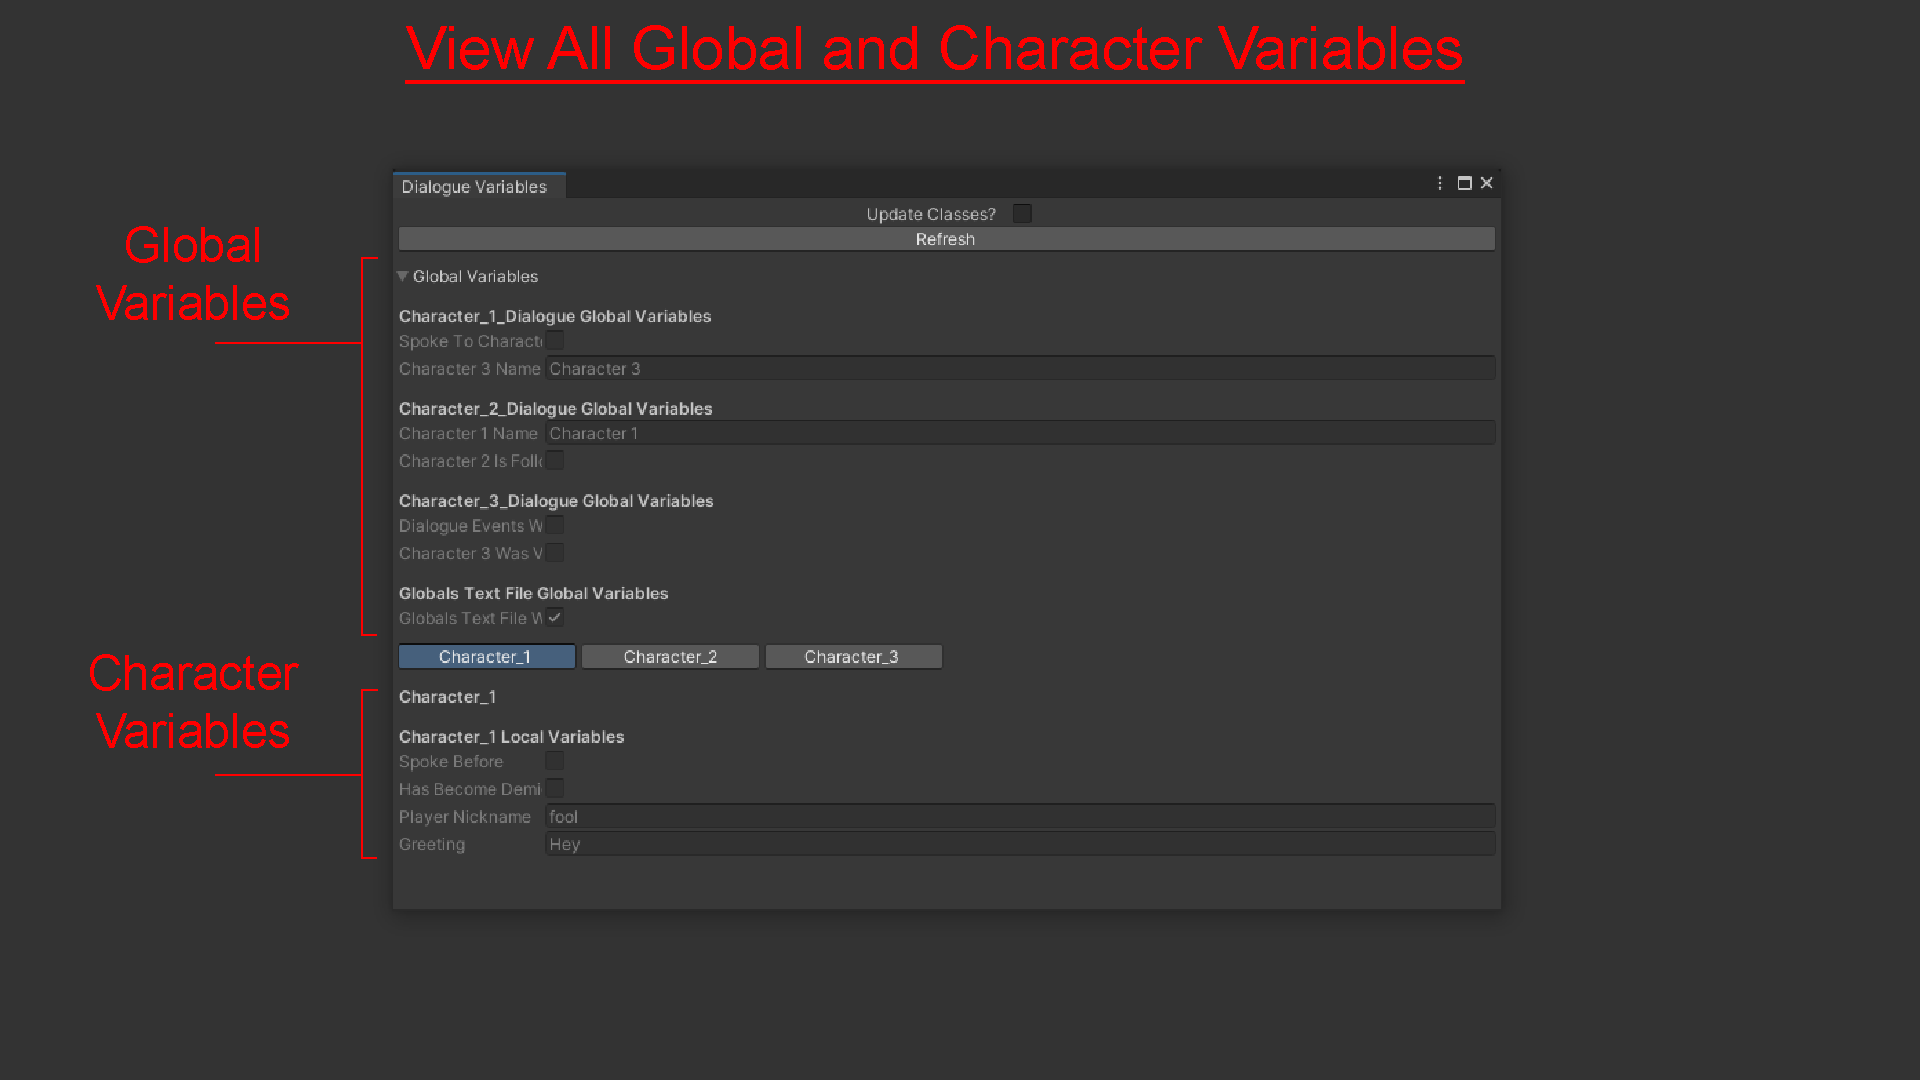
Variables Window
There is a variables window available for viewing the global variables and the local variables of each character that are defaulted to being read only.
This is helpful to ensure that the starting state of dialogue is always as you intended but for testing it can be useful to have them be changed in the editor.
To make all variables editable you need only change the setting in the Preferences menu and recompile all scripts from this window. Then you can edit variable values as much as you want.
The Event Generator
The DialogueEventTrigger.cs script included with this asset is an easy way to author content that interacts with the global dialogue variables you defined. It is set up to reference global variables the same as the dialogue trees by typing “g.” followed by the variable name you want to reference.
DialogueEventTrigger.cs also has a C# event that will be automatically assigned to run your custom code so to trigger this code you need only trigger the even from DialogueEventTrigger.cs
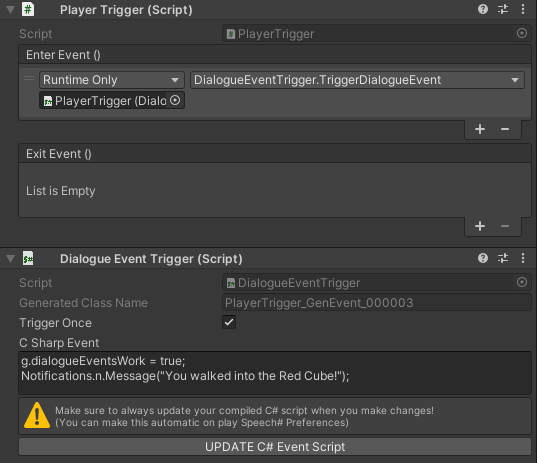
This system is included just for the convenience of creating dynamic content, but all variables can also be referenced the same way as any other C# script in Unity.
Setting Up a Scene
For a scene to work you only need a few key things: a player with a DialogueCharacter.cs component, a GameObject with the Globals.cs component, a UI manager for displaying dialogue, a character with a dialogue tree and a generated script, and your preferred system for displaying and progressing through the dialogue.
I have included examples to how these scripts could be set up and a prefab GameObject called “DialogueManager” that provides my versions of the needed scripts.
Recommendations for Customizing
Most of what I have made is based on the dynamic laid out in “General Structure” section of this document. Because of this, most of the scripts I’ve written have some dependencies on this structure.
It’s certainly possible to rewrite your own versions of all of this with your own assumptions and that may be necessary if you have a particularly unique dialogue mechanics planned for your game, but to keep adoption simple I would recommend adding additional needed logic or references to an inherited class of the DialogueCharacter.cs component.
The DialogueCharacter.cs component and inherited classes are the core script that a “character” in this system is built around. It is what provides all references for the dialogue trees to make writing logic and connecting to other core systems as easy as possible.
If you want to add other systems that should be easily referenced in the dialogue trees then you can look at how the Globals.cs is referenced in generated dialogue C# files and change the template that these scripts are generated from.
Through editing DialogueCharacter.cs and the templates of generated scripts, it should be easy to accommodate any system and will make it easier to build onto this system, rather than remaking it from scratch with a slightly different set of assumptions.
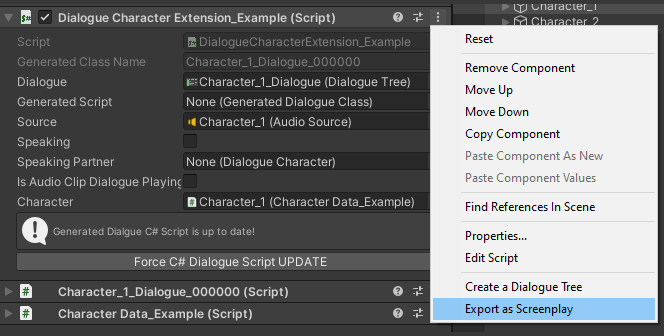
Exporting
To make easy for actors to record your dialogue, you can export a text file in the screenplay format. There is a guide to using the exported text file in the “Dialogue Screenplays” folder.
And there is additional information on the documentation section of the website.

Peformance
65.2%
5% since last month
Peformance
65.2%
5% since last month

Peformance
65.2%
5% since last month
Peformance
65.2%
5% since last month